Mastering The Art Of Drywall Installation: A Step-By-Step Guide
Are you ready to take your home improvement skills to the next level? Mastering the art of drywall installation can significantly enhance the look and feel of any space while adding value to your property. In this comprehensive guide, we will walk you through the step-by-step process of hanging drywall, from selecting the right materials to applying the finishing touches for a professional result. Whether you're a seasoned DIY enthusiast or a homeowner looking to tackle your first drywall project, this article is packed with valuable tips and techniques to help you succeed. From preparing your space effectively to navigating tricky areas like corners and ceilings, we've got you covered. Get ready to transform your space with confidence as we break down each stage of the drywall installation process in detail
Choosing the Right Materials for Your Drywall Installation Project
When embarking on a drywall installation project, selecting the right materials is crucial to ensure a successful outcome. The first decision you'll need to make is choosing the type of drywall that best suits your needs. Standard drywall is perfect for most interior walls and ceilings, while moisture-resistant green board is ideal for areas prone to high humidity such as bathrooms and kitchens. Next, you'll need to consider the thickness of the drywall. Thicker drywall panels provide better soundproofing and insulation, making them perfect for shared walls or rooms where noise reduction is essential. On the other hand, thinner drywall is easier to work with and may be sufficient for areas with minimal sound or temperature transfer requirements. Once you've determined the type and thickness of the drywall, it's time to think about joint compound. Joint compound, also known as drywall mud, is used to cover the joints between drywall panels and create a smooth, seamless surface. There are different types of joint compound available, including pre-mixed and powdered varieties. Pre-mixed joint compound is convenient and ready to use right out of the container, while powdered joint compound requires mixing with water to reach the desired consistency. Don't forget about drywall tape, which is essential for reinforcing the seams between drywall panels. Paper tape is a popular choice for its flexibility and ease of use, while mesh tape is self-adhesive and less likely to bubble or crack over time. In addition to these primary materials, you'll also need the right tools for the job, such as a utility knife, taping knives, sandpaper, and a drywall saw. Investing in high-quality materials and tools will not only make the installation process smoother but also ensure a professional-looking finish that will stand the test of time
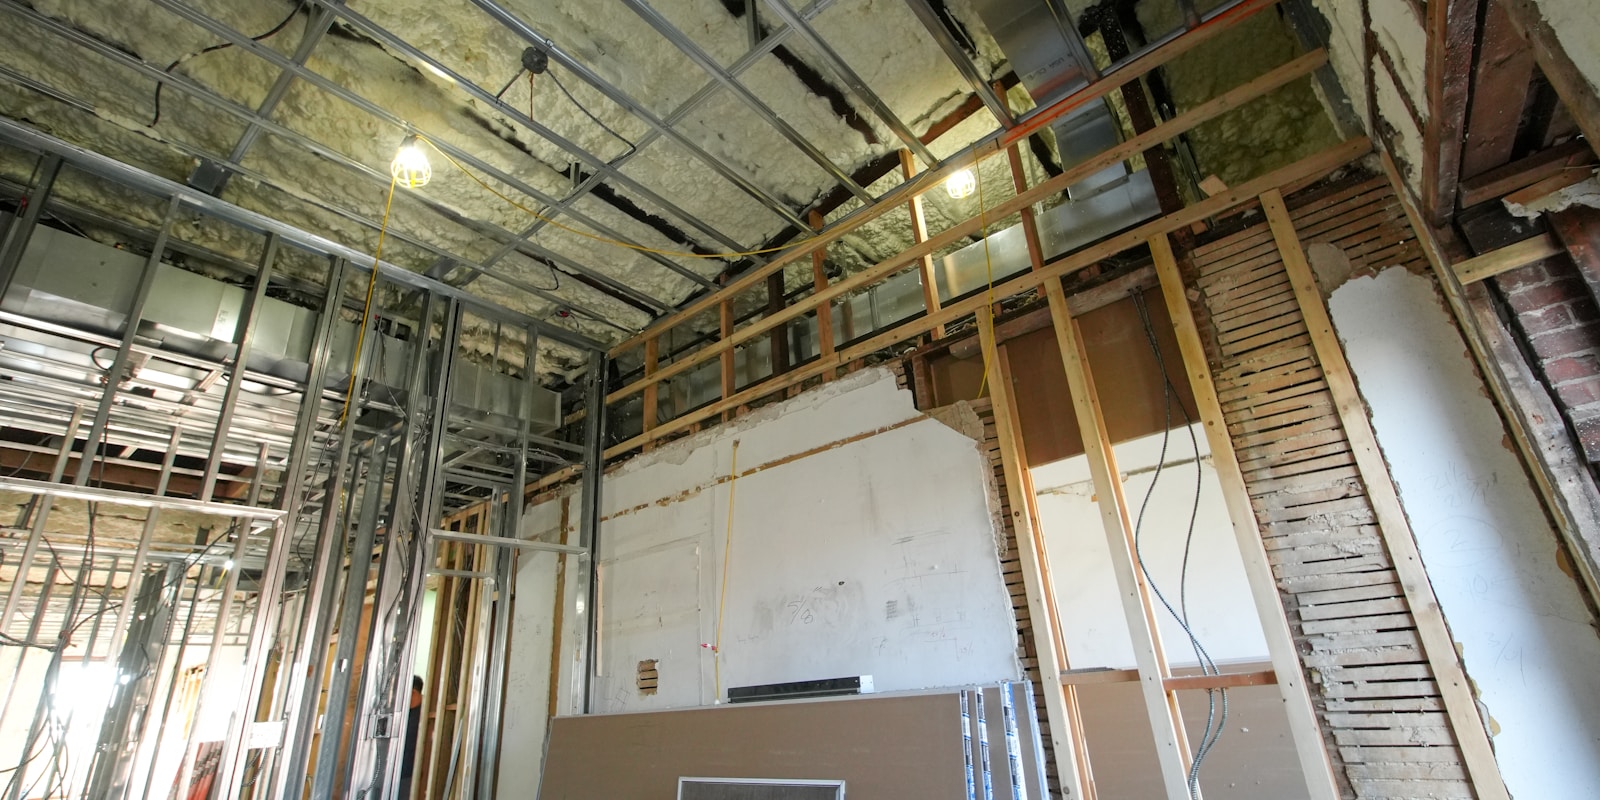
Preparing Your Space: Tips for a Successful Drywall Installation
When embarking on a drywall installation project, proper preparation is key to ensuring a successful outcome. Here are some essential tips to help you prepare your space like a pro: 1. **Clear the Area:** Before you begin, make sure the space where you'll be installing the drywall is clear of any obstructions. Remove furniture, decor, and other items to allow for easy access and maneuverability. 2. **Protect Floors and Furniture:** Cover floors with drop cloths or plastic sheeting to protect them from dust, debris, and any potential damage during the installation process. Consider covering furniture as well to prevent it from getting dirty or damaged. 3. **Gather Your Tools and Materials:** Make sure you have all the necessary tools and materials on hand before you start. This may include drywall sheets, joint compound, tape, screws, a utility knife, a T-square, a drywall saw, a drill, a ladder, and safety gear such as gloves and goggles. 4. **Measure Twice, Cut Once:** Take accurate measurements of the space where the drywall will be installed to ensure a precise fit. Remember the old carpenter's mantra: measure twice, cut once. This will help minimize waste and ensure a professional-looking finish. 5. **Plan Your Layout:** Decide on the orientation of the drywall sheets before you start hanging them. Consider factors like the location of doors, windows, and corners to optimize the layout and minimize cutting. 6. **Establish a Workflow:** Determine a logical sequence for installing the drywall, taking into account the size and shape of the space. Start from one corner and work your way methodically across the room to ensure a seamless finish. 7. **Check for Electrical and Plumbing:** Before installing the drywall, make sure to check for any electrical wiring or plumbing pipes behind the walls. Mark their locations to avoid damaging them during installation. By following these tips and properly preparing your space for drywall installation, you'll set yourself up for a smooth and successful project. Remember, attention to detail and thorough preparation are crucial when mastering the art of drywall installation
Mastering the Technique: Step-by-Step Guide to Hanging Drywall
When it comes to drywall installation, mastering the technique is crucial for achieving professional-looking results. Hanging drywall may seem like a straightforward task, but there are several steps involved to ensure a smooth and polished finish. 1. **Prepare the Workspace**: Before beginning the installation process, it's essential to prepare the workspace properly. Clear the area of any obstacles and cover floors and furniture to protect them from dust and debris. 2. **Measure and Cut the Drywall**: Measure the dimensions of the wall and cut the drywall panels accordingly. Use a utility knife to score the drywall's face and snap it along the scored line for a clean cut. 3. **Hang the Drywall**: Start by hanging the top row of drywall panels first, securing them to the ceiling joists with drywall screws. Ensure that the panels fit snugly against the ceiling and each other to minimize gaps. 4. **Tape and Mud the Seams**: Once the drywall panels are installed, it's time to tape and mud the seams to create a seamless finish. Apply joint tape over the seams and cover it with joint compound using a drywall knife. Smooth out the compound to blend it with the drywall surface. 5. **Sand and Finish**: After the joint compound has dried, sand the seams and any rough areas to create a smooth surface. Apply a second coat of joint compound if necessary and sand again for a flawless finish. 6. **Prime and Paint**: Finally, prime the drywall surface to seal it and create a smooth base for painting. Once the primer has dried, apply your chosen paint color to complete the installation process. By following these step-by-step guidelines for hanging drywall, you can master the art of drywall installation and achieve professional results in your next home improvement project
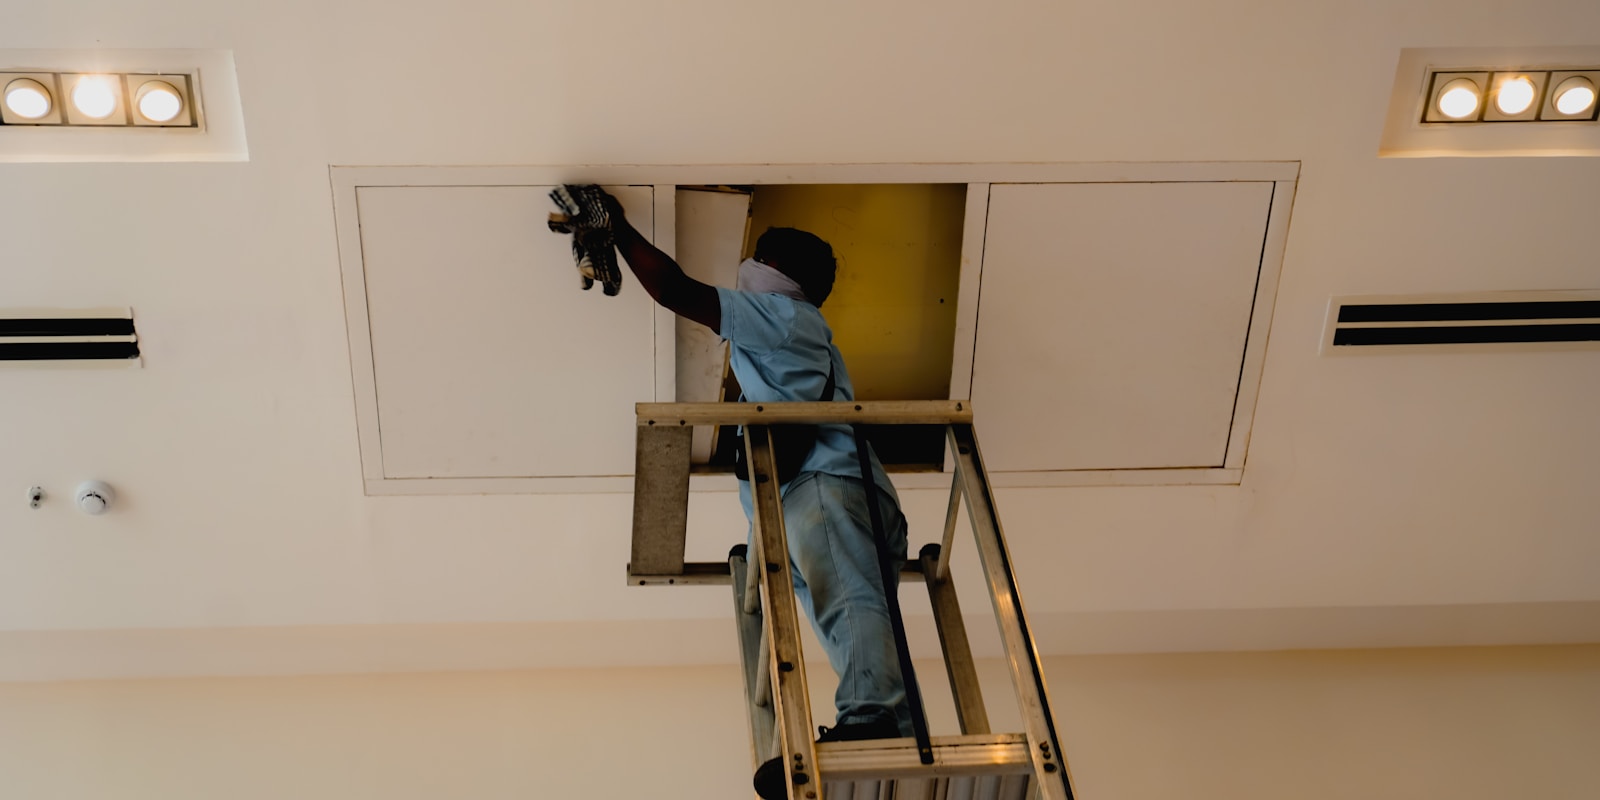
Tackling Tricky Areas: Navigating Corners and Ceilings During Installation
Navigating corners and ceilings can be some of the trickiest aspects of drywall installation, but with the right approach, you can master these challenges like a pro. When it comes to corners, precision is key. Start by measuring and cutting your drywall pieces accurately to fit the corner snugly. You may need to bevel the edges where the two pieces meet for a seamless finish. Utilizing corner bead tape can also help reinforce and protect these vulnerable areas. Ceilings present a different set of challenges, especially when dealing with height and gravity. Having a sturdy ladder or scaffold is crucial for safety and efficiency. Consider enlisting a helper to hold the drywall in place while you secure it to the ceiling. Taping and mudding the seams on the ceiling may require a bit more finesse to achieve a smooth surface, but taking your time and applying multiple thin coats will yield professional results. To tackle tricky areas effectively, consider investing in specialized tools such as corner trowels, inside corner knives, and drywall lifts to make the job easier. Proper planning and preparation, alongside patience and attention to detail, are essential for successfully navigating corners and ceilings during drywall installation. By following these steps and honing your skills, you'll be able to master the art of drywall installation with confidence and precision
Achieving a Flawless Finish: Secrets to Perfect Drywall Installation
After completing the laborious task of hanging drywall, achieving a flawless finish is the ultimate goal for any DIY enthusiast or professional contractor. To perfect your drywall installation, certain secrets and techniques can make all the difference between a mediocre result and a flawless finish. One of the key secrets to achieving a flawless finish in drywall installation is proper preparation. Before you even pick up a joint compound, ensure that your drywall is properly hung and seams are securely taped. Properly sanding the seams and corners is also crucial for a smooth finish. Investing time in these preparatory steps will set the foundation for a flawless end result. Another essential secret is to use the right tools and materials. High-quality joint compound, sandpaper, and taping knives can make a significant difference in the final outcome of your drywall project. Investing in good tools may seem like a small detail, but it can make a world of difference in achieving that perfect finish. Consistency is key when it comes to achieving a flawless finish. Whether you are applying joint compound or sanding, maintaining a consistent technique and pressure is crucial. Rushing through the process or applying uneven pressure can result in visible imperfections that mar the finish. Lastly, patience is a virtue when it comes to perfecting drywall installation. Allow each layer of joint compound to fully dry before sanding and applying the next coat. Rushing through the drying process can lead to a subpar finish. Take your time, follow each step meticulously, and you will be rewarded with a flawless result that you can be proud of. By following these secrets and techniques, you can master the art of drywall installation and achieve a flawless finish that will elevate the look of any space
Conclusion
Conclusion: Mastering the art of drywall installation is a rewarding endeavor that can elevate the aesthetics of your space and increase the value of your property. From selecting the right materials to finishing with finesse, this step-by-step guide has equipped you with the knowledge and skills needed to achieve professional results. By following the tips and techniques shared in this article, you can confidently tackle your next drywall project, whether you're a seasoned DIY enthusiast or a first-time homeowner. Remember to prepare your space meticulously, pay attention to details in tricky areas like corners and ceilings, and approach each stage of the installation process with precision. With this comprehensive guide at your disposal, you're ready to transform your space with confidence and master the art of drywall installation